
Mac Tips
I’m creating those tips to help people improve their workflows (or arrive at a point where what they’re doing with their computer can be called “workflow” for the first time).
The key that is labeled Option on newer Mac models might be labeled with Alt on older models (before ~2017).
1 Images
1.1 Convert HEIC Images to JPEG
HEIC (High Efficiency Image Format) is a relatively new image format developed by Apple, which offers better compression and image quality compared to JPEG. However, it’s not as widely supported as the more popular JPEG format. Converting HEIC images to JPEG can be necessary to ensure compatibility with older devices, software, or sharing across platforms.
Here’s a short guide on how to convert HEIC images to JPEG using macOS:
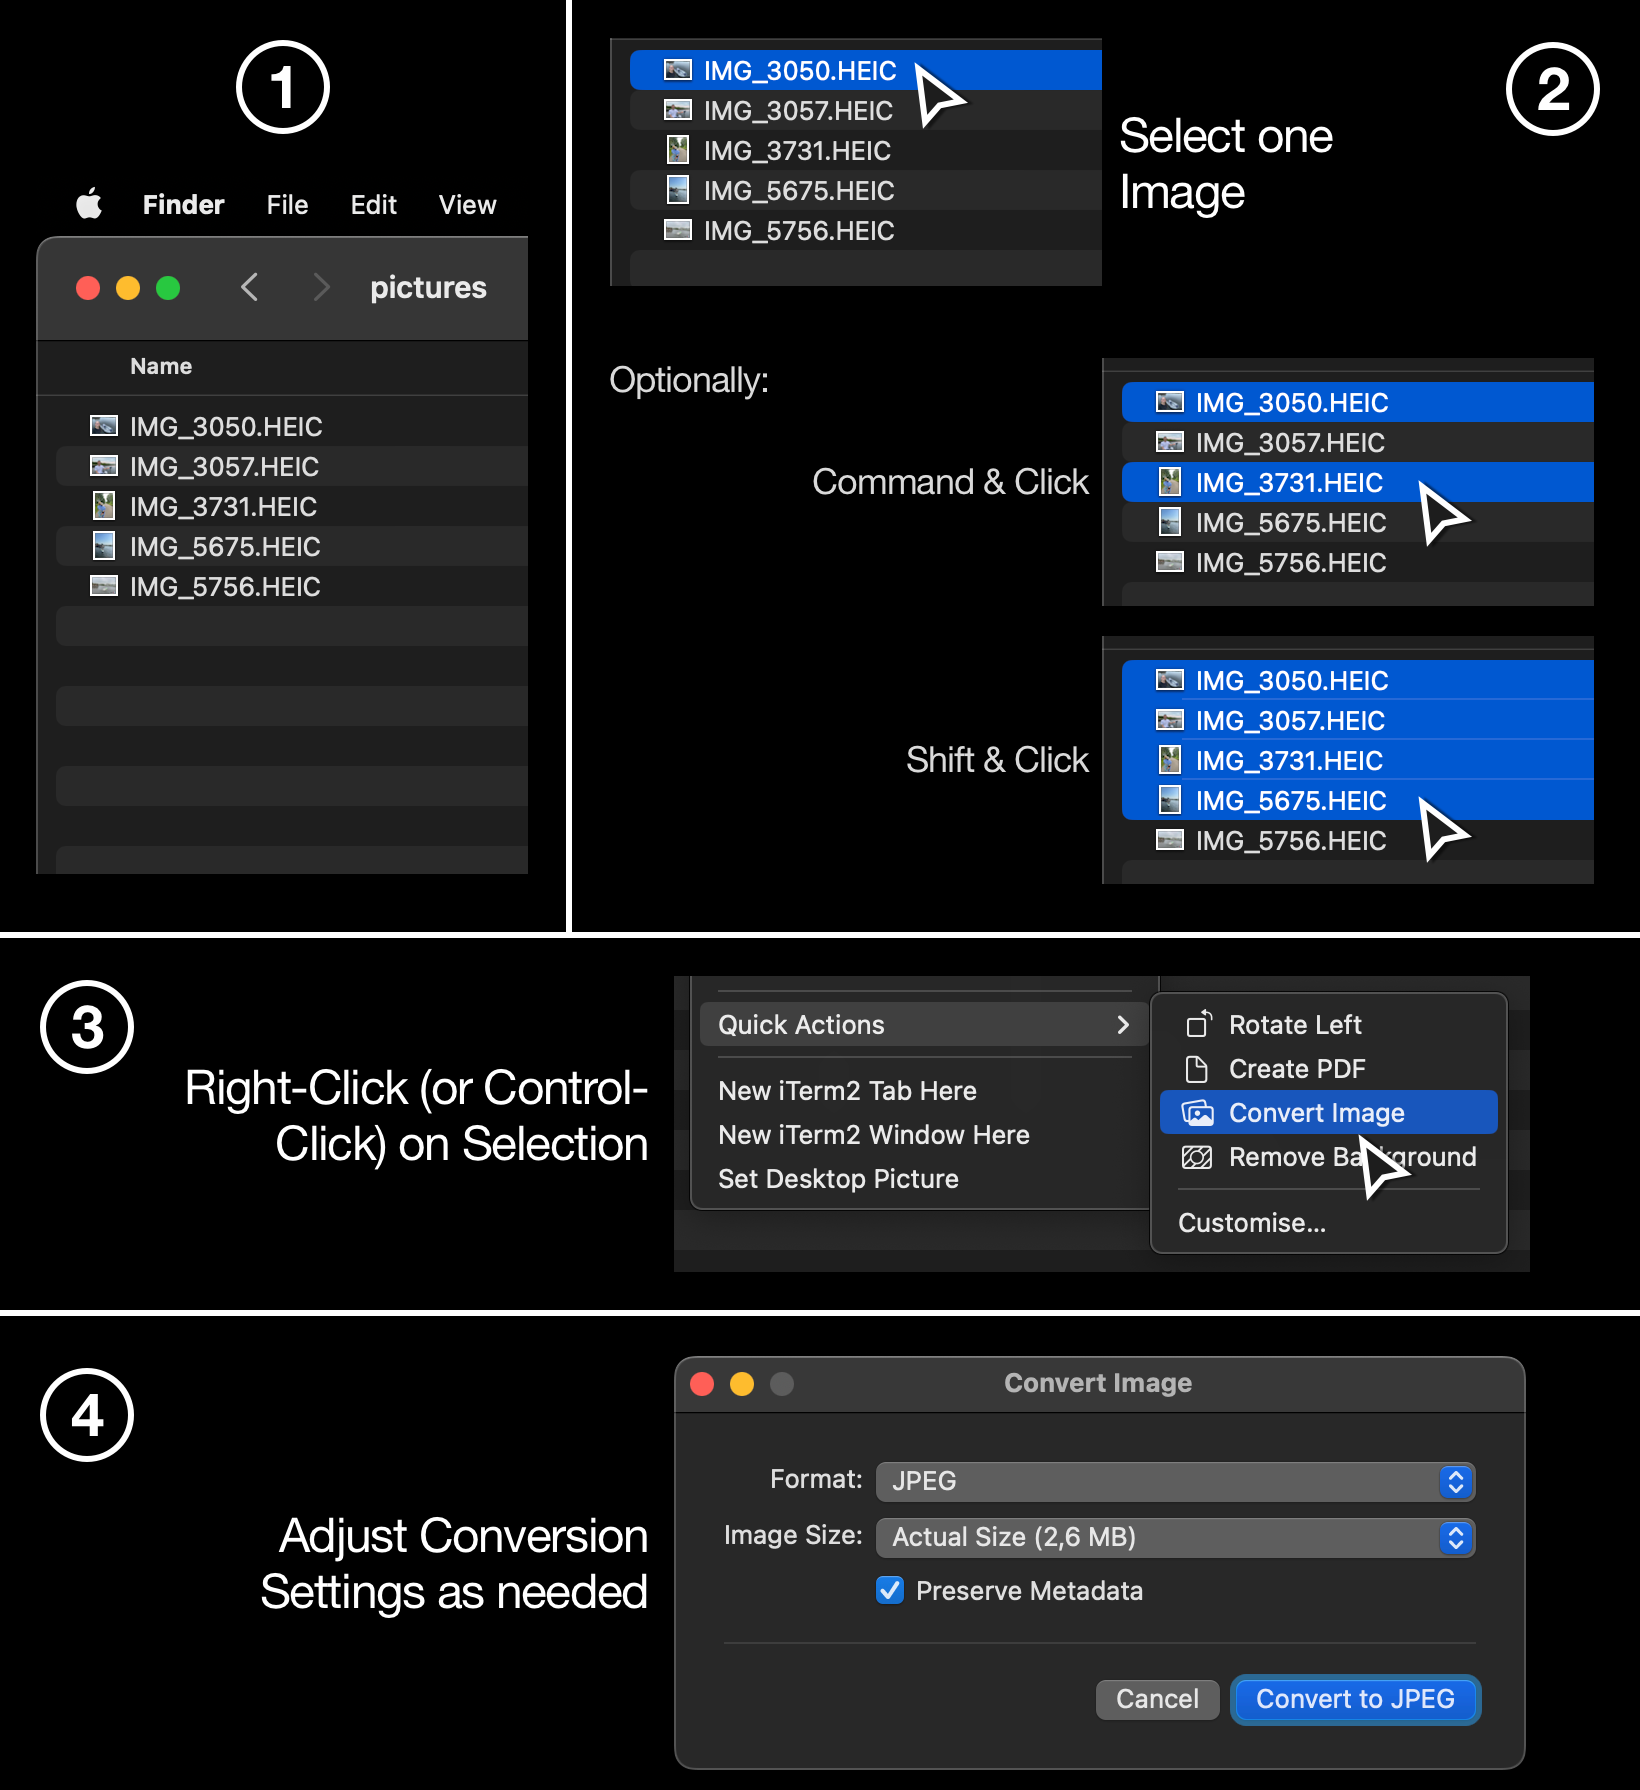
- In Finder, open the folder that contains the images in HEIC format.
- Select images in Finder: Click an image once. Then (optionally) hold Shift and click another image to select a continuous group of images. Or hold Command and click to select multiple individual images.
- Right-click (or Control-click or click with two fingers) on one of the selected files. Select Quick Actions -> Convert Image.
- Select the target format JPEG and optionally decrease the image quality by selecting an image size other than Actual Size.
If you’re running an older version of macOS, the context menu entries needed in step 3 might not be available.
1.2 Scale Image Size
With macOS’s built-in Preview app (called Vorschau in German), it is easy to change the resolution of an image. This will reduce the amount of memory needed by the image.
Note: The following steps will modify the image file which is irreversible. Make a copy of the file beforehand if you want to keep the original full resolution image or if you don’t know which new resolution fits your requirements and need to experiment a bit.
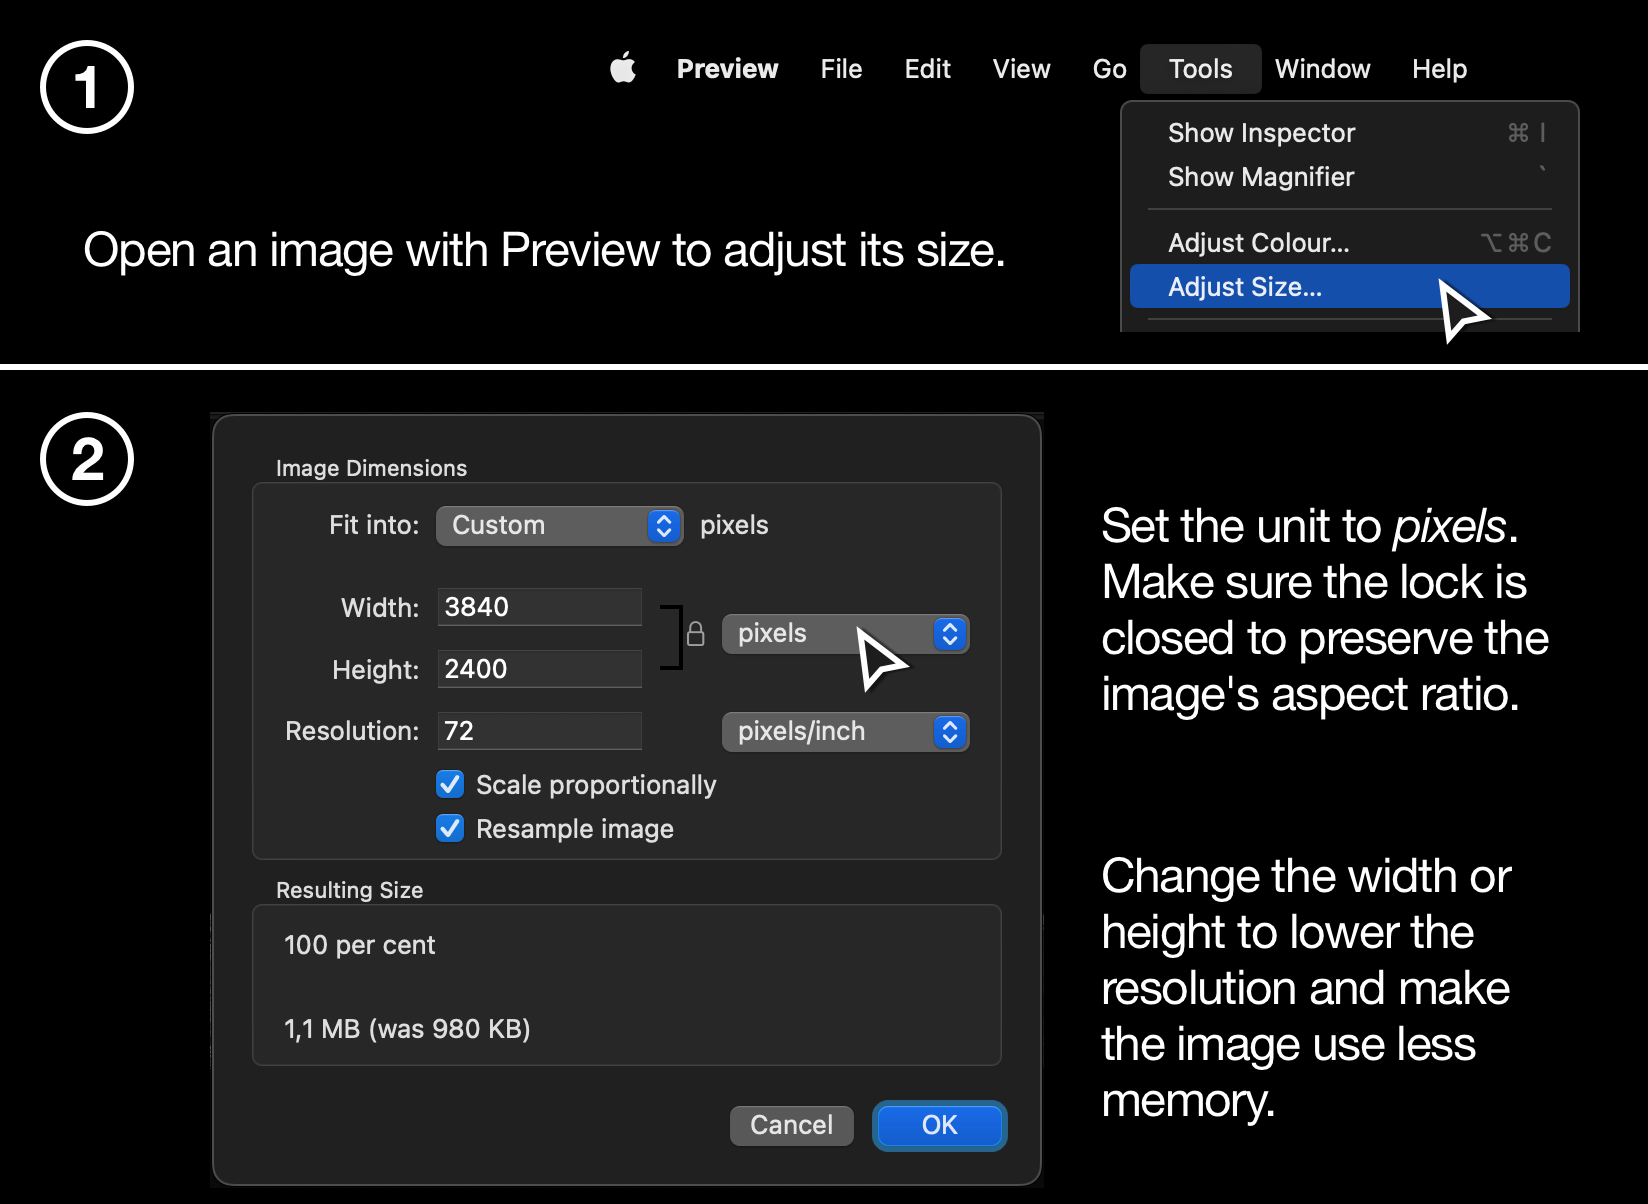
- Open the image in Preview by double-clicking it in Finder or on the Desktop. Then go to Tools -> Adjust Size…
- In the window that now opened, you can make settings to alter the image’s resolution. Make sure that pixels is selected and update the resolution. You’ll see a preview of the resulting file size below.
For reference an image taken with a modern iPhone has a resolution of 4032 px x 3024 px, while a full HD video has a resolution of 1920 px x 1080px.
1.3 Crop Images
To crop images on macOS, you can use the built-in Preview app. Here’s a short explanation of the process:
- Open the image with Preview. If it doesn’t open in Preview when you double-click it in Finder, you can Right-click (or Control-click) the image file and select Open With and choose Preview.
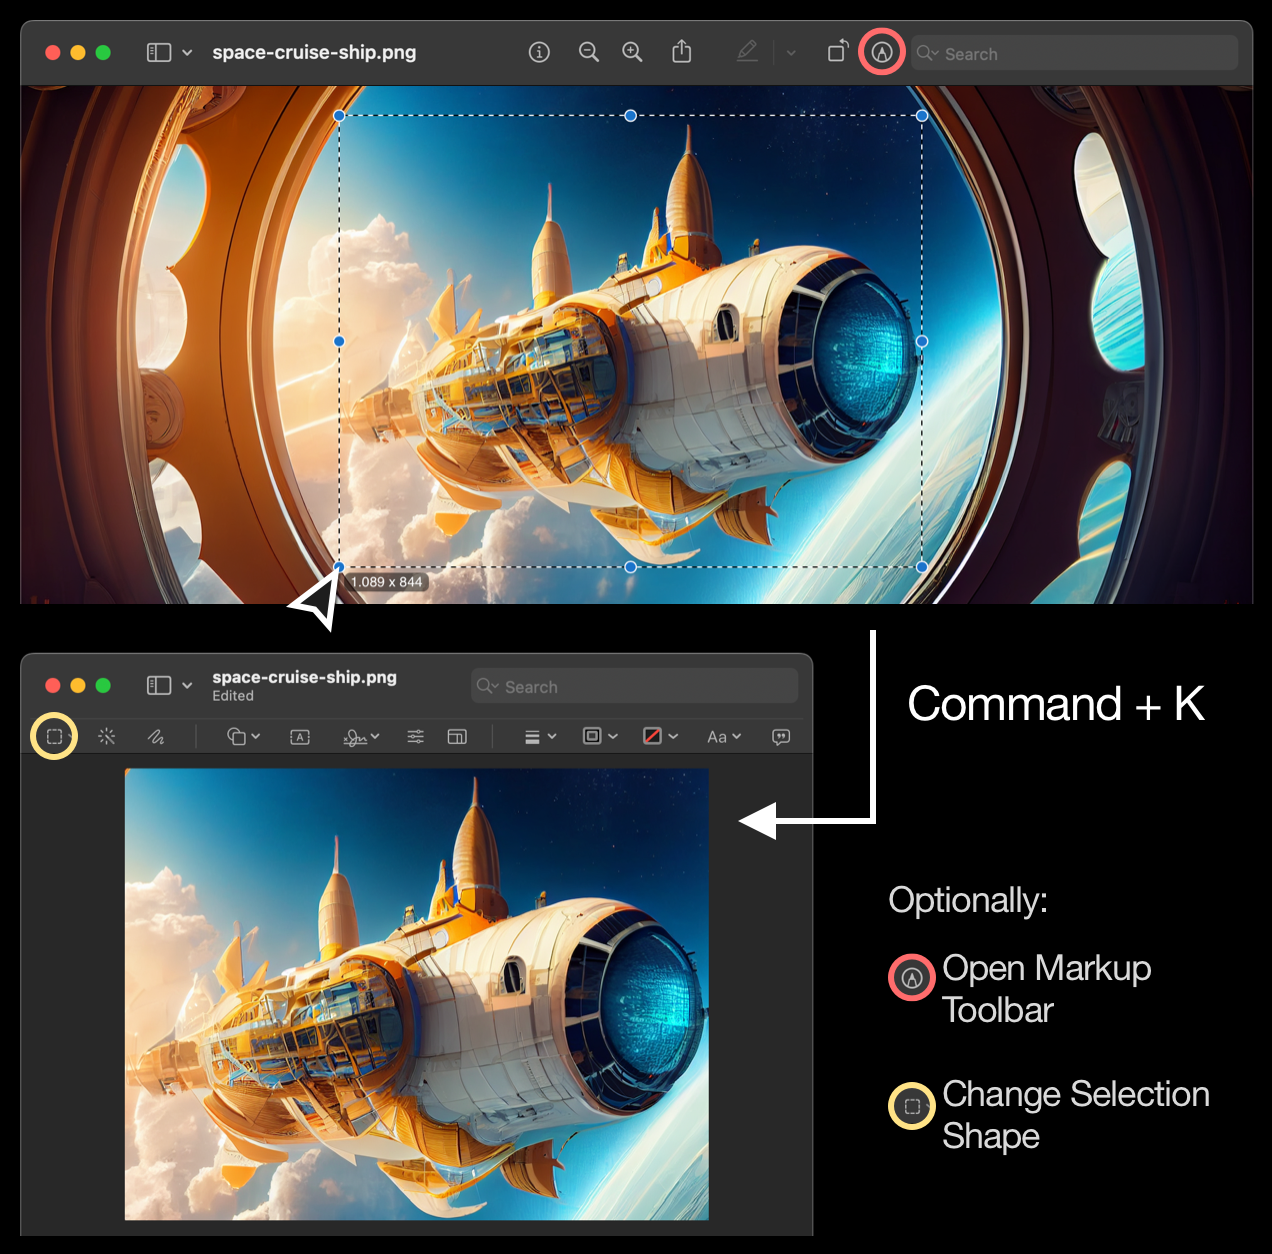
- Crop the image: Make a selection on the image. Just click and drag a rectangular selection over the image. Alternatively, open the Markup Toolbar by clicking the icon shown in the image below (highlighted in red) and then change the selection shape, e.g. to be a circle (highlighted in yellow).
- Once you’re satisfied with the selection, click on Tools in the menu bar, then choose Crop or press Command + K.
You can then save the cropped image:
- To save the changes to the original file, click File in the menu bar, and then select Save or press Command + S.
- To save the cropped image as a new file, click File in the menu bar, select Export… and choose the desired format, name the file, and click Save.
2 Universal
2.1 Navigate text quickly
You can not only use the arrow keys to move in text one character at a time.
- Option + Arrow Keys: Jump from one word to another.
- Command + Arrow Keys: Jump to the beginning / end of a line or paragraph.
2.2 Forward Delete
Usually, when pressing the delete button, you delete the character that’s left to your cursor. This operation is called backward delete. You can instead perform a forward delete which will remove the character on the right side of you cursor by holding the Fn key while pressing the delete key.
2.3 Sidewards Scrolling
When using a mouse with a normal scroll wheel, you’re usually only able to scroll up and down. But when holding the Shift button while scrolling, you can also move the page left and right. This works in browsers but also in other apps like Sketch or Photoshop in which you work with some form of canvas.
3 Spotlight
You can open Spotlight by clicking the little magnifying glass in the top right corner of the screen or (better) by pressing Command + Space. It can do far more than just search for files on your Mac.
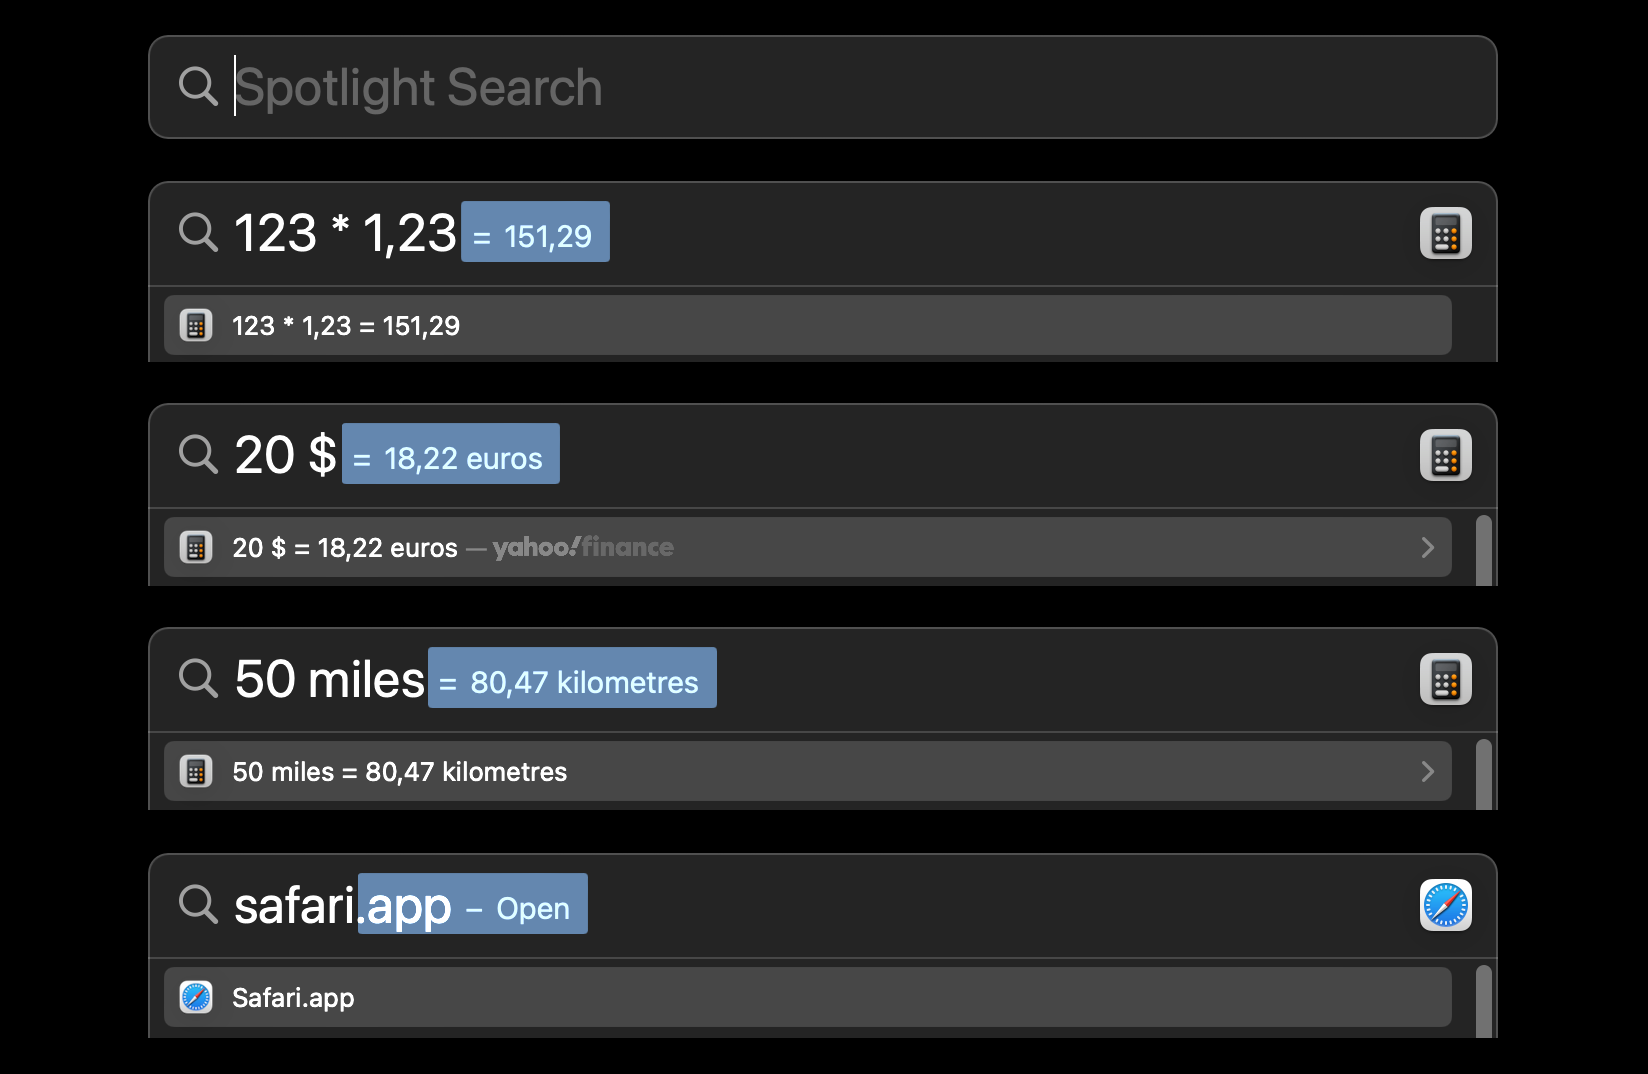
Just type something and let spotlight do the math. You can convert currencies, units (far more than just distances; try velocities, pressures, temperatures, …). You can also type the name of an app you want to open, e.g. Safari and then press Enter to open it.
4 Browser shortcuts
Using a webbrowser can be so much faster when keyboard shortcuts are used. I’ll list a few most important ones below.
Most important browser shortcuts (Cmd is short for Command):
- Cmd + T: Open a new tab.
- Cmd + Shift + T: Reopen the last closed tab.
- Cmd + W: Close the current tab.
- Cmd + Q: Quit the browser.
- Cmd + R: Reload the current page.
- Cmd + Click (on a link): Open the link in a new background tab.
Some more advanced ones:
- Cmd + L: Highlight the address bar, making it easy to type a new URL or search query.
- Cmd + Tab: Switch between open applications.
- Cmd + `: Switch between open windows of the same application.
- Cmd + Shift + Click (on a link): Open the link in a new foreground tab.
- Cmd + +/-: Zoom in/out on the current page.
- Cmd + 0: Reset the zoom level to default.
- Cmd + F: Find text on the current page.
- Cmd + G: Find the next instance of the searched text.
- Cmd + Shift + G: Find the previous instance of the searched text.
- Cmd + Left/Right Arrow: Go back/forward in browsing history.
- Cmd + Shift + J: Open the browser downloads window.
- Cmd + D: Bookmark the current page.
- Cmd + P: Print the current page.
5 More Tips
More tips will be added in the future :-)