
2020-06-10
Automatic Flowerpot Watering
I really like having flowers on my balcony, but unfortunately I’m not good at remembering to water them. This is why built an automatic watering system specifically designed for flowerpots. It uses cheap components and adapts easily to different kinds and numbers of flowers.
1 Controlling Components
The image below shows the components that are installed in the control box of the system which is sitting outside on my balcony.
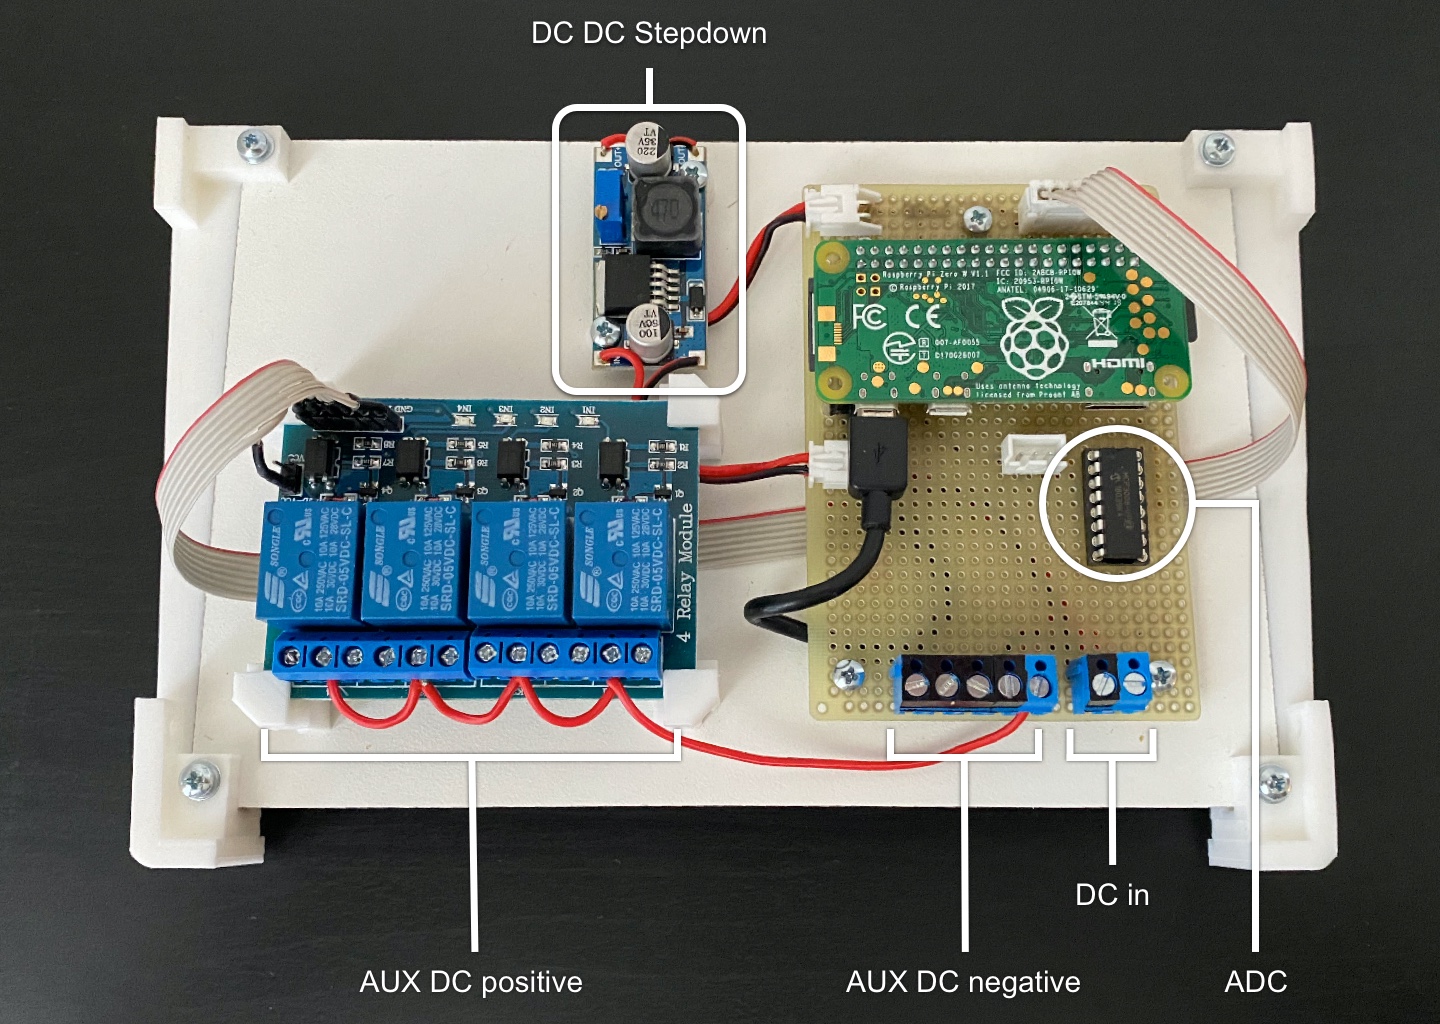
1.1 Raspberry Pi Zero W
The brain of my balcony watering is a Raspberry Pi W. It doesn’t use a lot of energy and is equipped with wireless LAN out of the box, meaning it can sit outside, only requiring a power connection and can still be connected to my home network. It’s running raspbian and my custom written python backyardbot software along with an apache webserver for users to interact with it. It’s powered via 5VDC which is supplied from the DC DC Stepdown right next to it.
1.2 DC DC Stepdown
The whole assembly is powered by a 12VDC power supply. All auxillary components like magnetic valves or pumps can use 12VCD and only the controlling components need 5VDC. The DC DC Stepdown does exactly this, taking 12V as an input and outputting 5V. The 5V are used by the Raspberry Pi, the relay assembly and is also available to power sensors.
1.3 ADC MCP3008
The MCP3008 is an ADC (analog digital converter) and connected to the Raspberry Pi. In contrary to most Arduino Boards, the Raspberry Pi doesn’t have any analog inputs. But since I’m planning to attach a light sensor (which outputs analog readings) to the system, I needed a way to read such inputs. The ADC connects to the Raspberry Pi via SPI and there already exist a lot of tutorials on how to interface it with Python. Next to the MCP3008 is a white socket: This is a connector for a sensor offering GND, +3.3V and a signal pin which is connected to one of the ADC’s inputs. A light sensor with the equivalent connector can just be plugged in.
1.4 Relay Array and Auxillary Ports
The first iteration of the balcony watering only uses a single pump to water all of the plants at once but I’m already experimenting with magnetic valves to have a better control over the water flow. The Relays allow connecting a total of four actors, all of which are supplied with 12VDC. An array of GND ports is located on the right of the board, while the relays are switching the positive terminals. Each relay has a NO (normally open) and NC (normally closed) port.
Important note: Some of these ready made relay boards can be switched with 3.3V and 5V, some only with 5V. The Raspberry Pi outputs 3.3V on his digital pins so make sure that the board you have or want to buy is usable with the control voltage of your computer or micro controller before putting it all together.
2 Actors
In the current configuration, only one pump is controller but there are plans to expand the system with a few magnetic valves.
2.1 Pump
I choose a cheap 8€ pump from Amazon that has a connector that fits a hose with 8mm inner diameter. While this pump is easily powerful enough to supply more than two flower beds, it’s worth noting that a pump is not necessarily a valve when you disconnect it from power. What I mean by that is shown in the figure below:
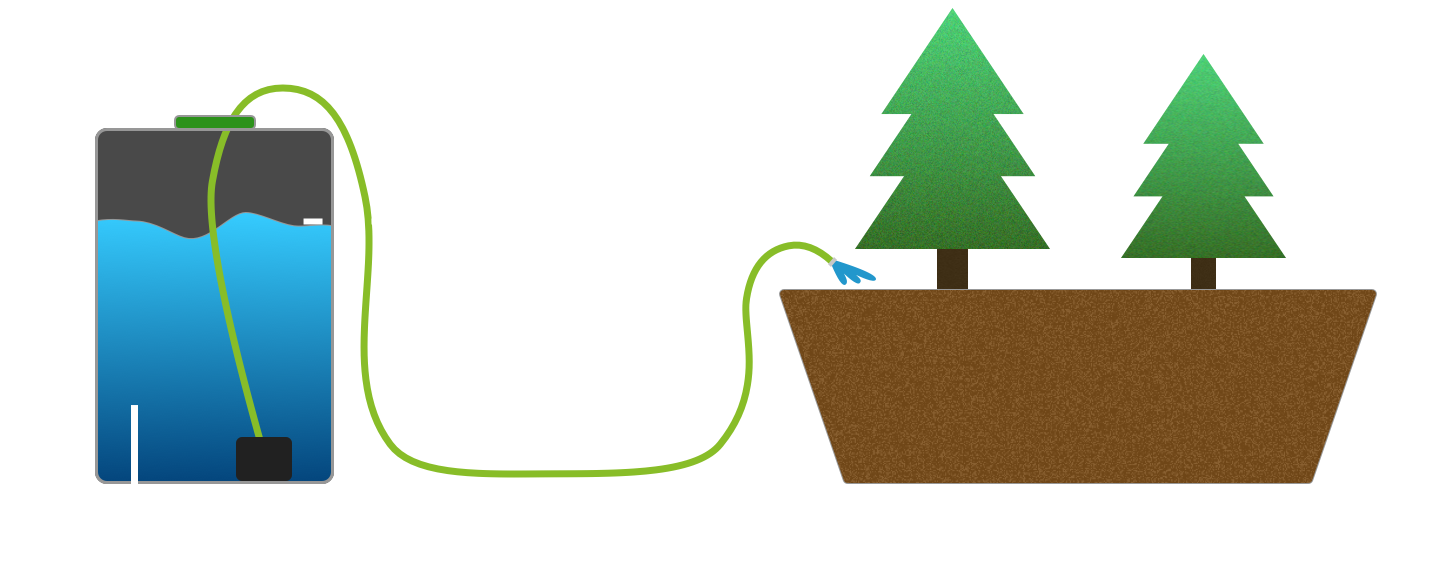
There are a few options to prevent this from happening. The most obvious is to elevate the flowerbed in some form, e.g. by putting it on a table or attaching it to the balcony railing. Another option would be to buy a pump that stops the water flow once it is not powered anymore. Since I didn’t want to buy a new pump and the first two options weren’t an option on my balcony, I’m only filling the water tank half way at the moment.
I plan to extend the system with some magnetic valves. Not only can this stop the water flow but it also enables me to water different plants for individual durations using just one pump. Three relays in my setup aren’t in use and there are a lot of magnetic valves that run on 12VDC.
Another very important note on the water tank: Make sure no light can get into the tank. Light enables algae to grow in the water tank which in turn can clog the pump. Either use a tank made from an opaque material or paint it in a dark color on the outside.
3 Sensors
No sensors are attached to the system at the moment. The hardware is already there but I didn’t have time to write the software to use them. Should the data only be used to control the watering duration, rough estimates from the online weather forecast might suffice.
4 Setup Summary
The electronics are housed in a plastic box that is located on my balcony. To make sure that the components are safe even if water gets into the box, drill a small hole at the bottom so that it can escape easily.
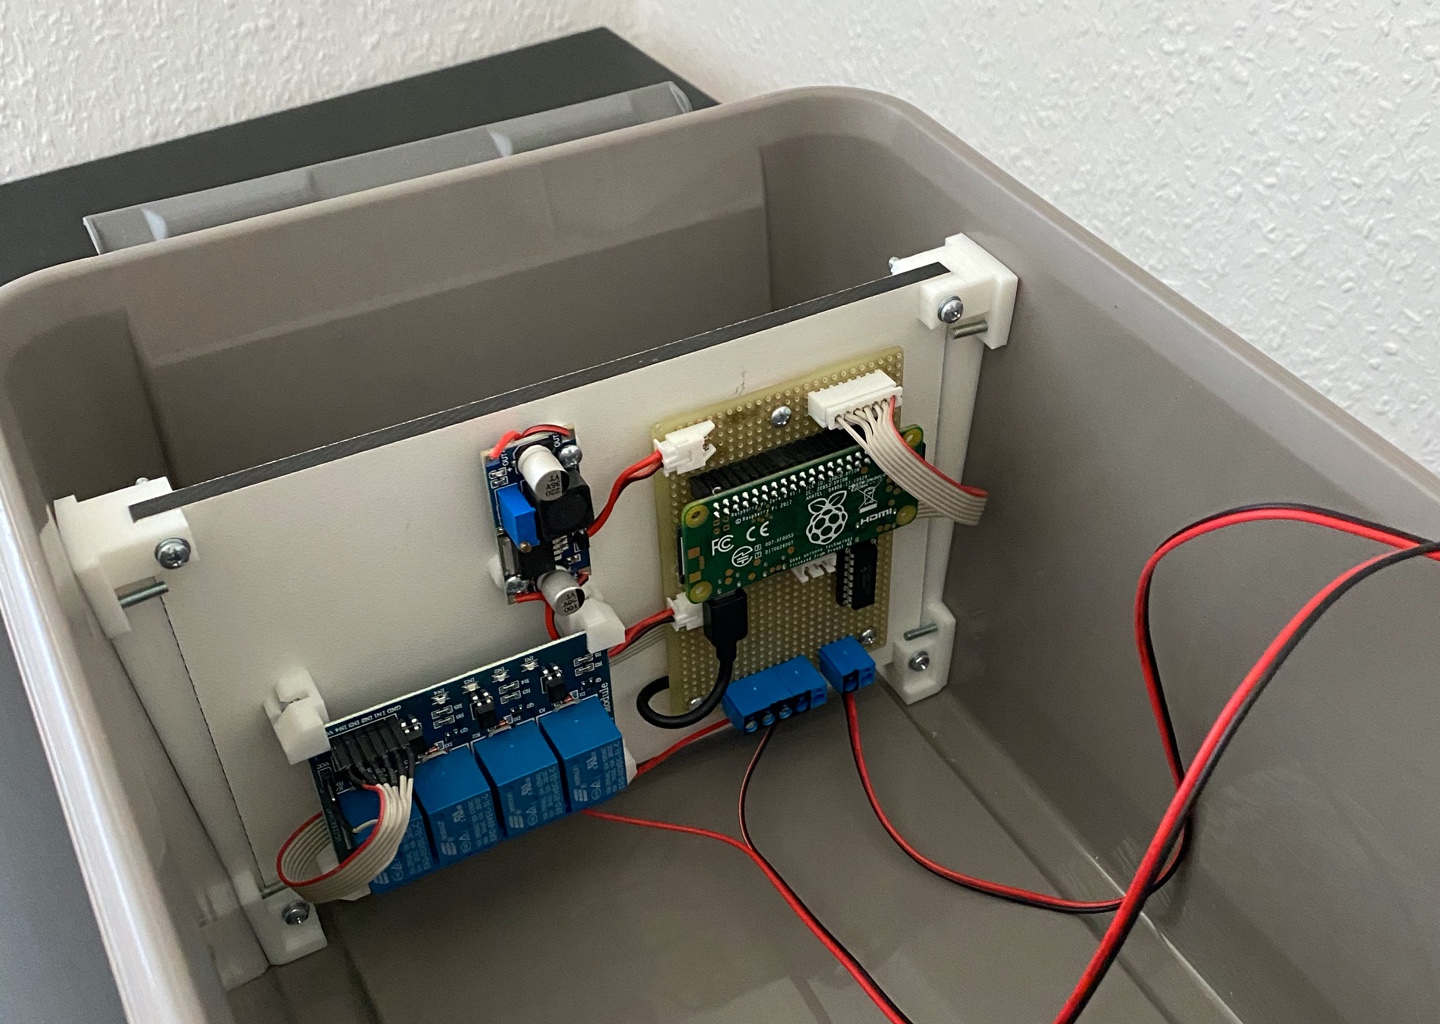
The Raspberry Pi connects to my home WLAN reliably and I can control the system without the need to put a LAN cable on my balcony.
5 Outlook
The system is in a working state and does a good job at keeping my plants healthy. Future improvements include a magnetic valve for a more fine grained water control as well as sensors to monitor the plant’s health.