
2021-01-24
Dell PowerEdge R210 II Setup in 2021
2021-05-01: Adding notes on enabling SATA ports.
2023-10-01: Added info in iDRAC6 Docker.
To learn about what makes server hardware different from consumer grade products, I decided to buy an old Dell PowerEdge R210 II server from 2012 for about 150€. Here I will not describe all of the steps I performed to get the system up and running, but rather the problems that I encountered under way and how I solved them.
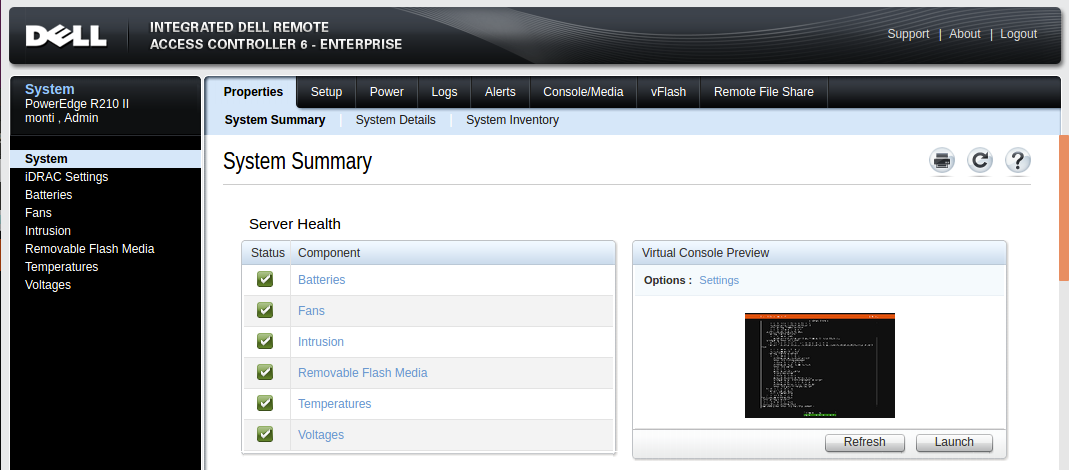
Before doing any installs of new software or firmware updates, I set up the iDRAC6 (integrated Dell remote access controll version 6) so that I can fully control the server from my laptop even when no operating system is installed and the server is powered off. I’m using iDRAC6 Enterprise.
1 iDRAC6 Setup
Boot the server when it’s connected to a monitor using its VGA port and wait for the monitor to prompt you to press CTRL + E to access the iDRAC6 configuration. I recommend to reset the iDRAC6 settings to the factory defaults, as I had encountered connection issues that were only resolved after performing the reset. Then enter your desired network settings and the server should be reachable from the browser if you enter its IP. As I’m using iDRAC6 Enterprise, I connected the network cable to the dedicated iDRAC6 RJ45 connector and chose Dedicated in iDRACs interface settings.
Keep in mind that the iDRAC6 software is old, even after updating the firmware. Do not make connections to the iDRAC6 interface available outside your local network.

After setting up iDRAC’s network preferences I was able to connect to it using a browser on my laptop. All following steps are performed without having a monitor attached to the server.
1.1 iDRAC6 User Accounts
Even though I’m only using iDRAC6 in my local network, I wanted to increase security. This is why I created a new account with admin rights which I would use for any further modifications. After logging in with this new account, I disabled the default account named “root.”
Setting up a new account is mainly straight forward using the iDRAC6 web interface. The password of the new user can have a maximum length of 20 characters. Check that you can log in from your new account before deactivating the old one.
1.2 Remote Desktop using Docker
This section was added later to the article as I just learned recently about this docker container.
I will describe two ways of running the iDRAC software which you need to connect to the server’s remote access control. One of them uses docker and the other one installs iDRAC on Ubuntu. I prefer the first option as I’m comfortable with using docker and the setup process is quicker.
The link to docker hub is given below and the Usage section on this image’s overview page provides a run command.
iDRAC6 on DockerHub
The next section describes the native install on Ubuntu without using docker.
1.3 Remote Desktop on Ubuntu
I wanted to stream the content of the server’s video output to my laptop so that I can do the remaining setup without physical access to the server. My laptop is running Ubuntu 16 Desktop in this example. Receiving the stream is done with a Java app. It uses outdated security mechanisms and to get it running, some Java security settings had to be changed.
Click the Launch button in the web interface to download the viewer.jnlp file. It contains a configuration file for Java Web Start which you can use with javaws viewer.jnlp after completing step one (see below). As this wouldn’t work right away, this is what I did to get the remote desktop working:
- Download and install Oracle Java, do not install with
apt
- Download jre: java.com
- Install instructions: ubuntu.com
- Make sure that
javawsrefers to the version you just downloaded. To be sure, you can run with the full path:/usr/local/java/jre1.8.0_281/bin/javaws viewer.jnlp
- Add idrac6 IP to exceptions list in:
- Add the IP of your iDRAC6 interface to the list of insecure sites that Java is allowed to use
- Run
/usr/local/java/jre1.8.0_281/bin/jcontrolwhich launches the Java Control Panel - Navigate to the Security tab and add the IP to the Exception Site List
- Change the allowed encryption algorithms:
- Since iDRAC6 uses encryption algorithms that are not considered safe anymore, we need to allow Java to still use them.
- In file
/usr/local/java/jre1.8.0_281/lib/security/java.security - Look for the line that starts with
jdk.jsr.disabledAlgorithmsand change it to remove MD5 encryption from the list of disabled algorithms:
# from
jdk.jar.disabledAlgorithms=MD2, MD5, RSA keySize < 1024, \
      DSA keySize < 1024, include jdk.disabled.namedCurves
# to
jdk.jar.disabledAlgorithms=MD2, RSA keySize < 1024, \
DSA keySize < 1024, include jdk.disabled.namedCurves- Look for the line that starts with
jdk.tls.disabledAlgorithmsand change it to remove MD5 and RC4:
# from
jdk.tls.disabledAlgorithms=SSLv3, RC4, DES, MD5withRSA, DH keySize < 1024, \
    EC keySize < 224, 3DES_EDE_CBC, anon, NULL, \
    include jdk.disabled.namedCurves
# to
jdk.tls.disabledAlgorithms=SSLv3, DES, DH keySize < 1024, \
EC keySize < 224, 3DES_EDE_CBC, anon, NULL, \
include jdk.disabled.namedCurvesThat should be it. After accepting a bunch of warnings every time I start javaws, the system works for me as intended.
2 Updating the Firmware
Now that iDRAC6 is fully functional I want to update the server’s firmware.
2.1 Dell EMC Repository Manager
12th generation PowerEdge servers and newer models can pull all of the necessary BIOS and firmware updates automatically from Dell’s servers using the LCC (lifecycle controller). While this also worked for 11G servers up until 2018 (the R210 II is part of the 11th generation), Dell now removed support for this and updating has to be done manually.
I read somewhere online that using the LCC should still be possible after creating a custom repository file with Dell EMC Repository Manager on Windows or Linux but this didn’t work for me. For me, EMC Repository Manager didn’t list the 11G servers so I couldn’t create a repository file for them on my laptop.
2.2 Accessing Server Firmware
The most recent firmware can be downloaded from Dell’s website but for whatever reason it is bundled within an .exe file. Download the .exe and install the Linux port of 7zip called p7zip to access its contents and thus the firmware.
sudo apt install p7zip-full
7z e downloaded_firmware.exe
Then look for the file firmimg.d6 in the unpacked files. This file can be used with iDRAC6. The System Summary Page even has a Quick Launch Task called Update Firmware.
Should you encounter the problem that after the Firmware update, you are immediately logged out automatically after you signed in to the web interface, delete your browser cache and restart the server (cut power completely to also restart iDRAC6). One of those did the trick. Tried them simultaneously, so not sure which one it was.
3 Installing an OS
From there on I continued to install an OS. I used the remote management to mount a virtual media in form of an ubuntu server iso file.
3.1 Enabling SATA Ports
I wanted to install an operating system onto a hard drive which was connected to one of the internal SATA ports. Unfortunately, the drive didn’t show up as a target for the installation. As it turned out, the respective SATA port was disabled in the system setup menu. This menu can be accessed at boot time by pressing F2, as shown in the image below.

This will lead to another menu where you can select the “SATA Settings,” which should then show a screen similar to this one:

The new hard drive I wanted to use was connected to Port A but before entering this menu, Port A was disabled. Simply changing the state of the port from “Off” to “Auto” resolved the problem for me. After doing a reboot, the disk showed up in the operating system’s installer.
3.2 Using Virtual Media
When using Virtual Media, there’s no need to flash a new operating system onto a USB stick. You can simply load the new OS from your personal computer onto the server using the network connection. To do that, open the Virtual Media window from the remote desktop window. Click the button labeled “Add Image” to select an .iso file from your local hard drive and don’t forget to tick the “Mapped”-checkbox to make the file available to the server at boot time. Keep the window open during install.
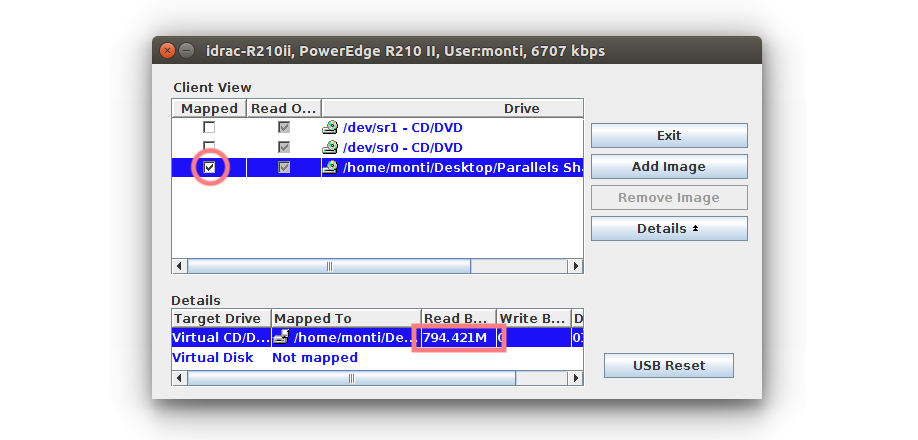
For the server to read from the virtual media can be pretty slow. When you think your server is hanging, just have a look at the amount of data read from the virtual media. You’ll then probably see that the server is still reading data - very very slowly.
A more detailed explanation on the process of using virtual media can be found here.
3.3 Remaining Setup
The remaining setup worked without problems and there are plenty of tutorials online on how to proceed from here.