
2020-07-18
(Mostly) Waterproof 3D Printing
This guide deals with a few adjustments and tricks I used to make my 3D printed hose connectors and watering sprinklers mostly water proof. My prints only leaked a few water droplets while operating for two minutes. This doesn’t make it good enough for indoor usage but certainly good enough for outside applications.
1 Printer Settings
Most 3D printers operate by laying lines of hot filament on top of each other. Since the fluid filament that is extruded from the nozzle is round there will always be small gaps between neighboring lines and layers of filament.
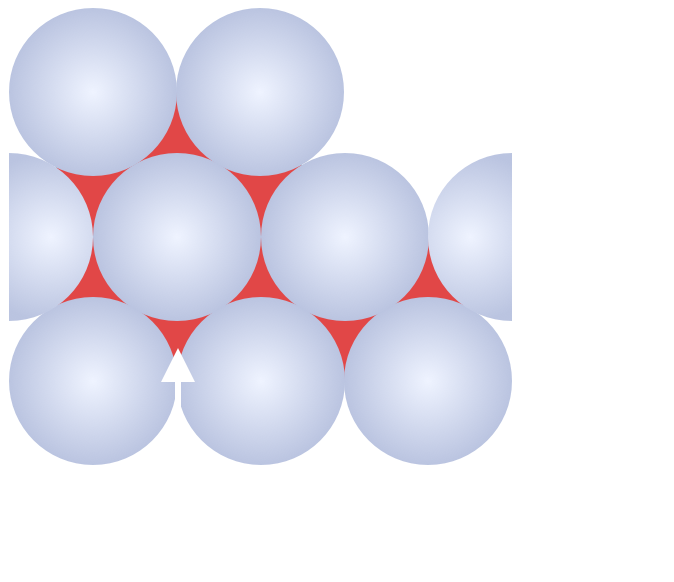
The image on the right illustrates this problem. The round filament lines (light blue) enclose hollow space between them (red) and pressurized water will be able to enter those voids and flow through them.
To counteract this problem, the 3D printer can be advised to use more filament by changing a setting in the slicing software. In Cura this option is known as Flow and I set it to 108%, meaning the printer will use 8% more filament than usual. This helps to narrow the voids between filament lines.
You can also turn the printing temperature up a bit, e.g. to 215°C (~420°F) to make the filament a bit more fluid in order to better close those gaps.
Keep in mind though, that hotter filament will cause less stability while printing, which means that also slight overhangs can benefit from support material. More filament extrusion will cause holes in your print (e.g. a screw hole) to become narrower.
Another important setting is to use 100% infill, meaning there shouldn’t be any holes in your print (apart from the tubes where the water is supposed to be).
2 Object Orientation
The next important aspect to improve the sealing capabilities of 3D printed objects is the orientation in which they are printed. The figure below shows a hose connector from a previous post on hose connectors and sprinklers. A hose will be pushed on to the connector to guide the water flow.
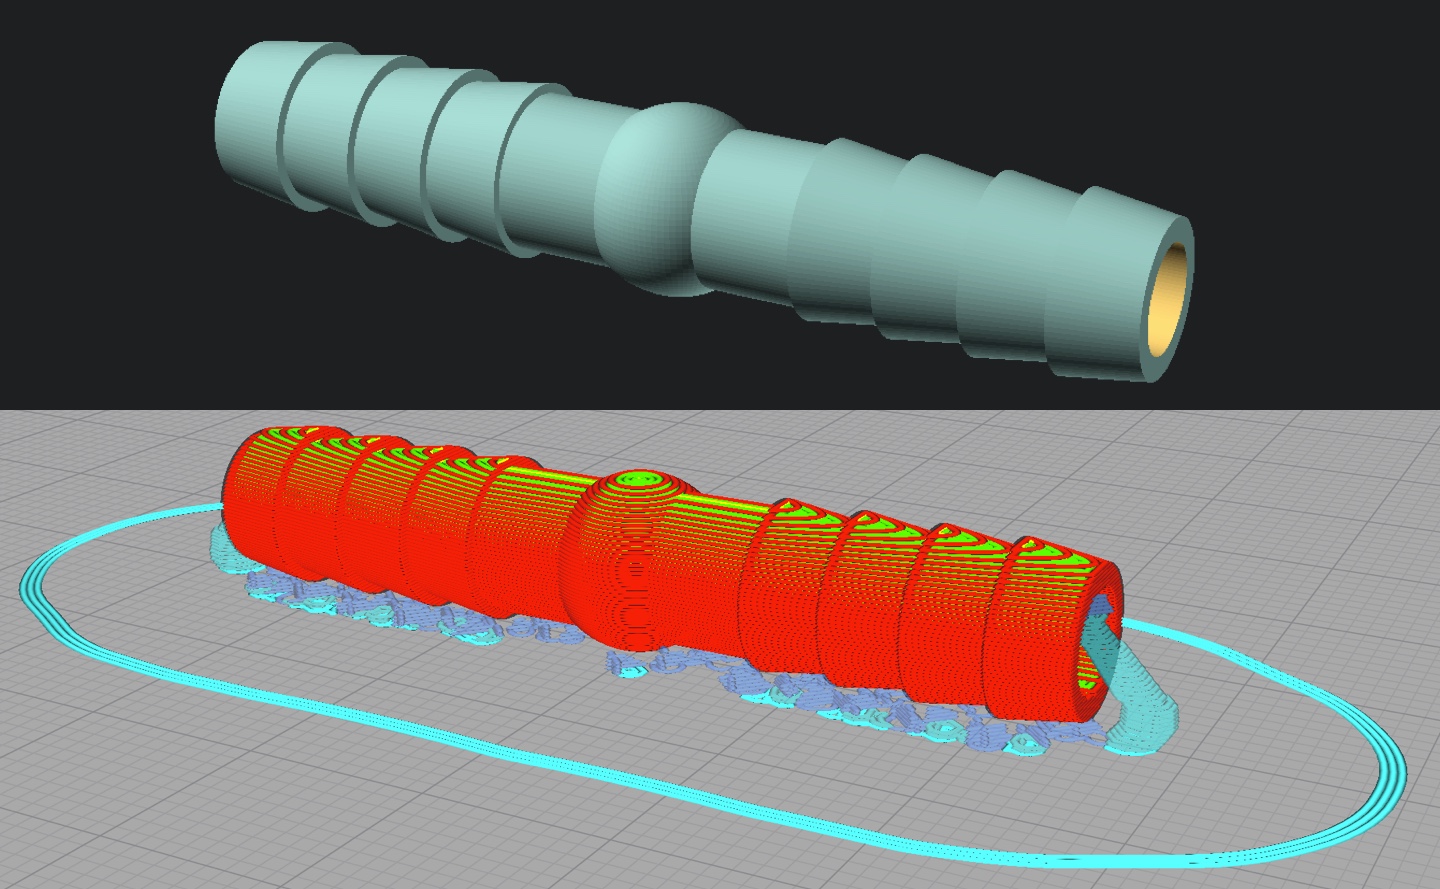
As it lays flat on the print bed, the printer stacks layers on top of each other such that the hollow space between the layers is oriented in the same direction in which the water pressure pushes. The figure below illustrates the biggest problem with these kinds of prints, the outer wall of the print (shown in red). The print’s structure creates small roundings on the outside of the print where the connector is supposed to seal with the hose. This, however, will not work very well as water can easily escape through the hollow space between neighboring layers and the hose.
Avoiding this problem is possible by rotating the object that is to be printed in a way that the contact surface of hose and connector is perpendicular to the direction in which the water applies pressure. This should drastically increase the watertightness of the print.
Make sure though, that the print still sits tight on the print bed. I recommend using a glue stick or crepe tape but you could also increase the size of the bottom layer in your slicing software to create a larger contact area.
Depending on the shape of the printed object, changing an object’s orientation to have all outlets parallel to the printing plane, might not always be possible. The printer always operates in the same plane and will only increase the z-position once a layer is finished. This is why the object design can already have a big influence on the sealing capabilities of a print.
3 Object Design
Note: The slices shown in this section use support material in the printing process. This will increase stability during the printing process and enable forms that couldn’t be printed otherwise. Make sure to only enable support on the outside. Removing the support material from the inside of the models shown in this section is difficult to impossible.
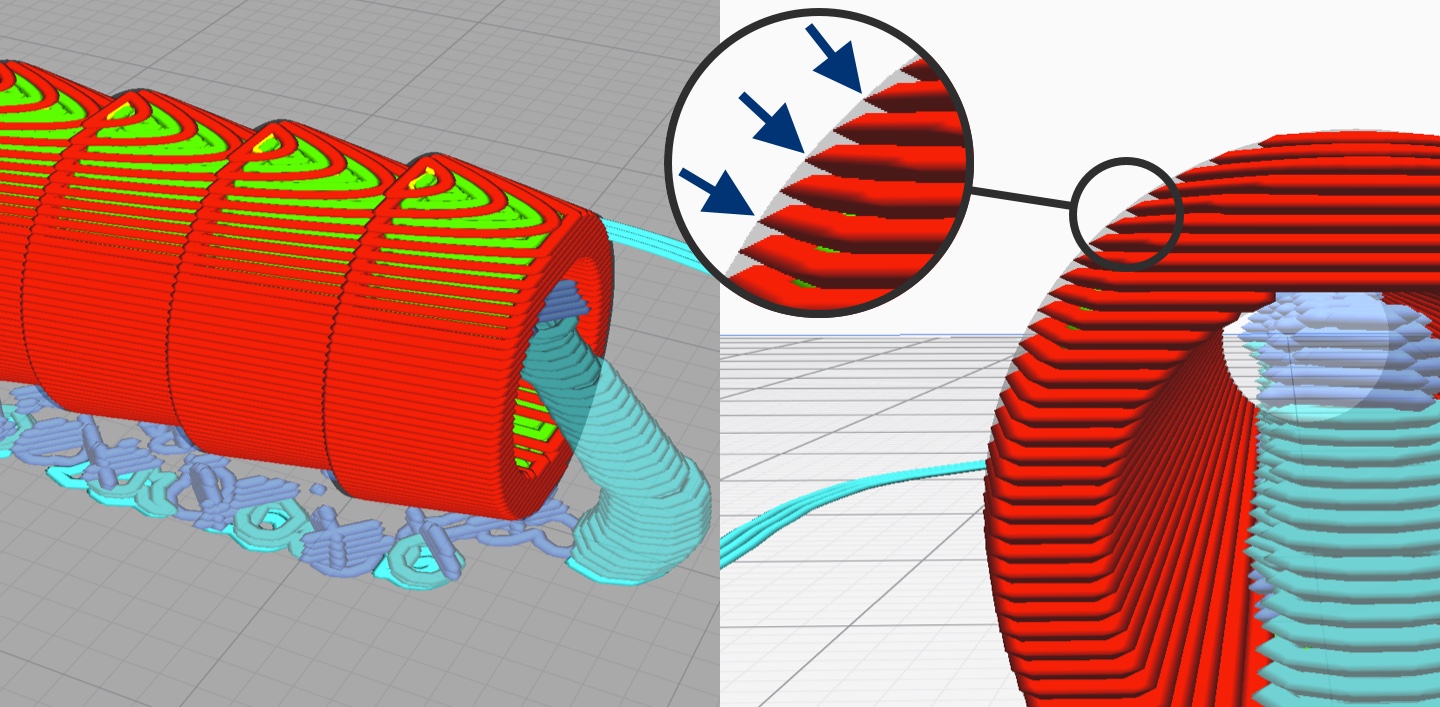
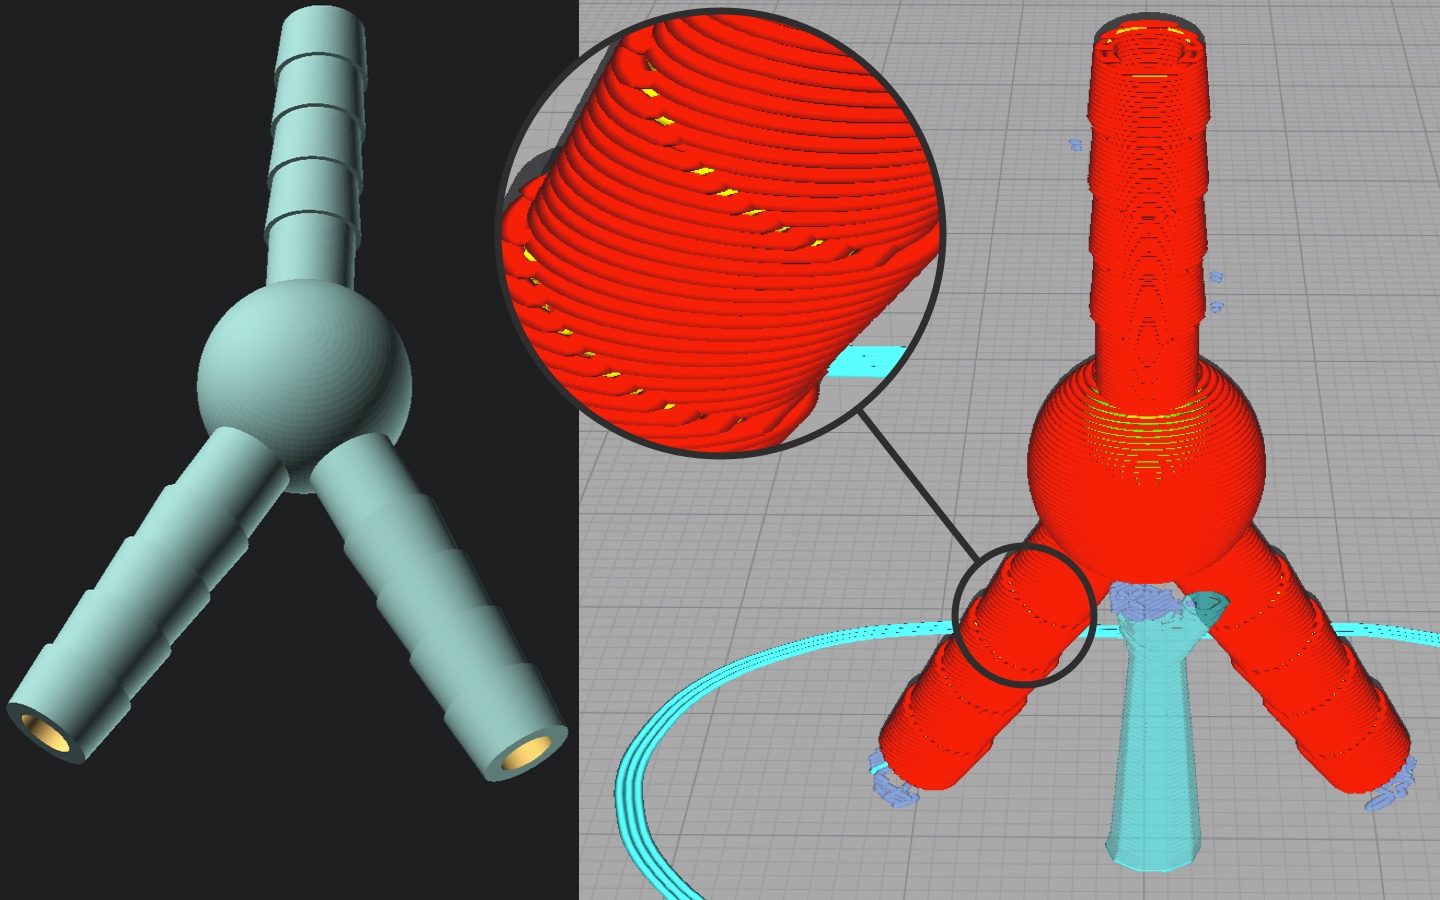
The correct layer alignment that was discussed in the previous section can only work if the model is designed in certain way. The following two figures compare the layer structure of two models that serve the same purpose but are designed in a different way. Both connectors take water from an inlet and distribute it to two outlets.
The y-shaped connector that is shown first does not allow to position all the connecting tubes in parallel. Due to the outlets being at an angled orientation, the layer structure is again irregular as shown in the magnification in the figure.
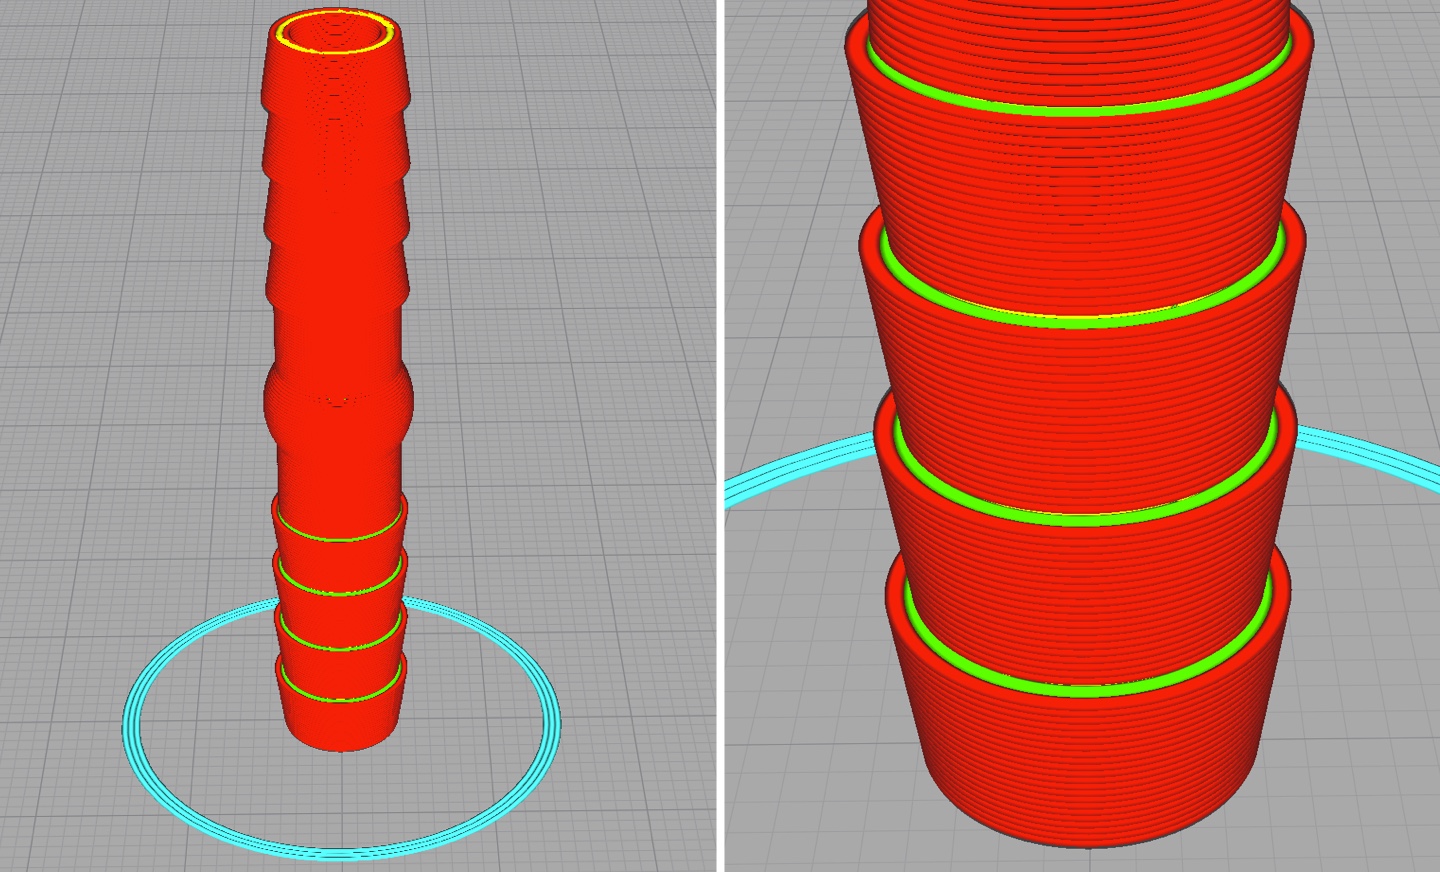
A different design accomplishes the same task with a box-shape rather than a y-shape. This allows all connectors to be parallel making the printing outcome better. The water will of course need to take two 90° bends inside the box-shaped model, while the flow direction was only slightly altered with the y-shaped model. Still the increased performance (i.e. leaking less water) is worth the different design and additional bends in the pipes.
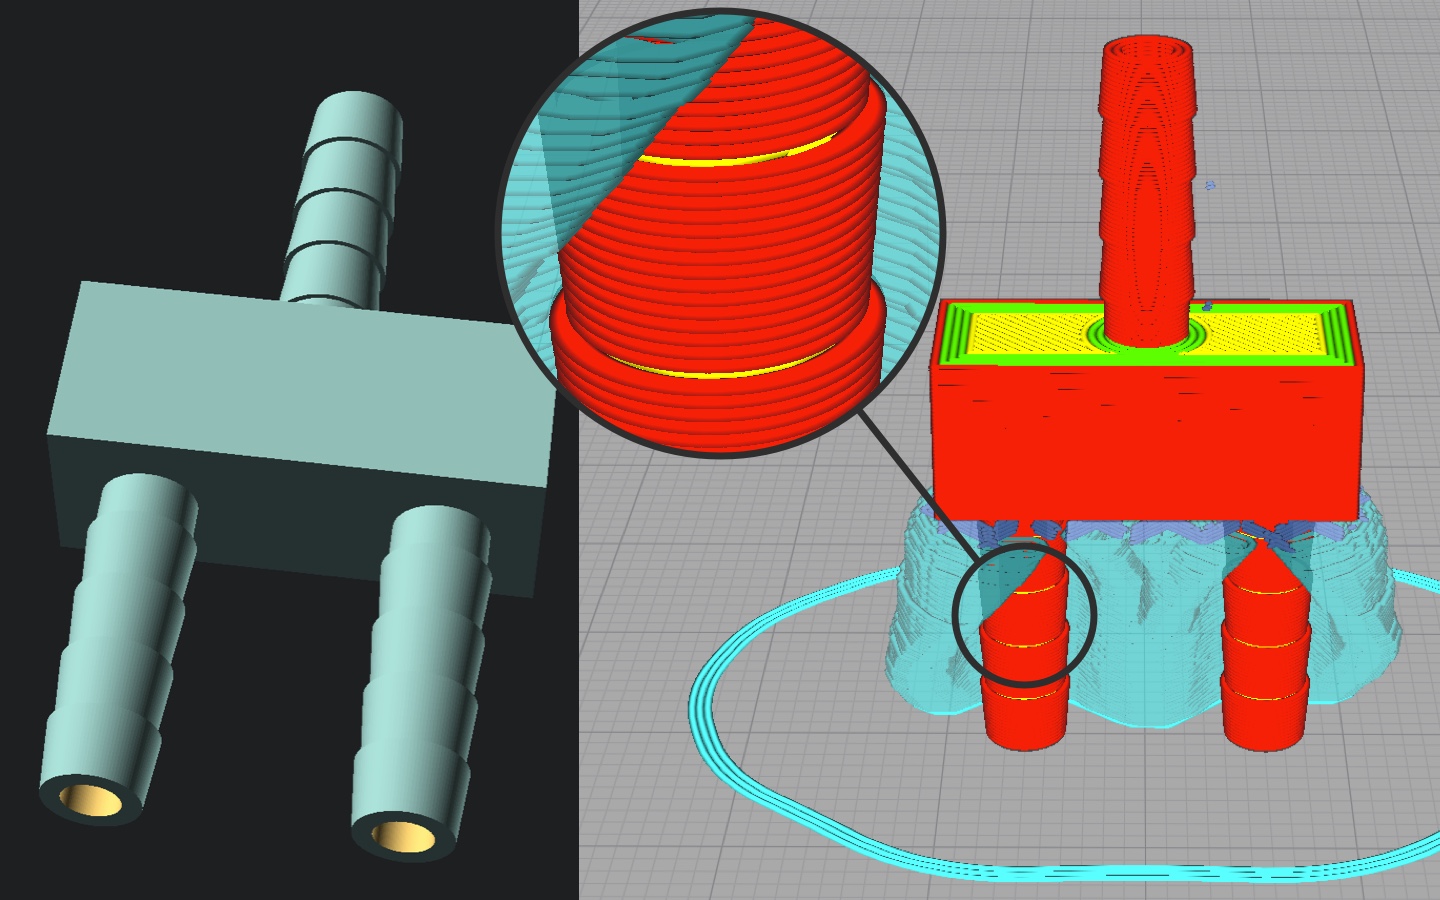
Remember to not print any support material inside of the models. Slicers have different preferences to tweak the areas where support is used and preventing it from building support inside the model can for example be done by disabling support that doesn’t start at the print bed.
4 Conclusion
The mentioned tricks and preferences enable printing mostly waterproof connectors. They are still occasionally leaking a droplet but this isn’t a big deal when used outdoors.
Parts similar to the ones shown on this page are also available off the shelf. I still printed my own parts to adapt to various hose diameters and come up with custom designs for sprinklers.